Changing Strings

Even a seemingly simple thing as stringing your violin up can be tricky without a good procedure for doing the task. Also there is advice from a string manufacturer on how one can speed up the playing in process of a brand new string and take the edge off the metallic sound in a matter of minutes.
Step 1
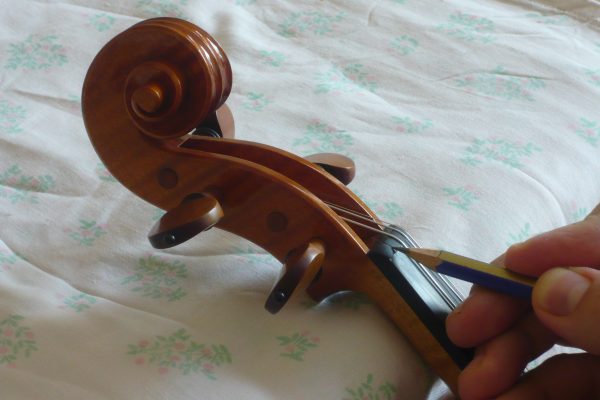
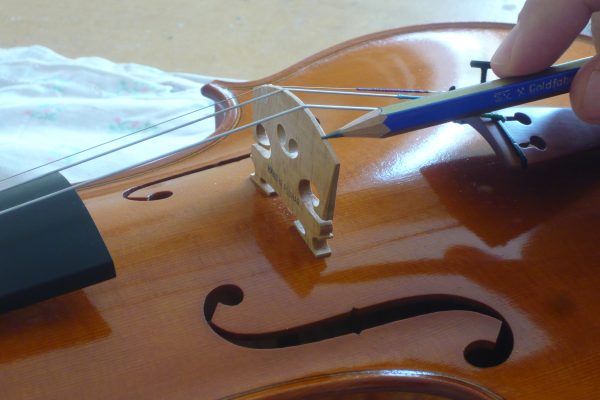
When I string up a violin there are a few things I watch out for: Every time I change a string I apply some graphite on the grooves of nut and bridge. A HB pencil is perfect for the task. This helps the string to slide smoothly and prevents the metal string windings being damaged and pulled apart. Also it helps keep the bridge in the upright position.
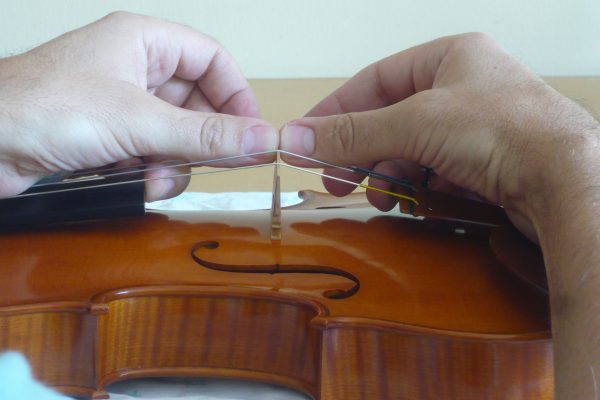
Step 2
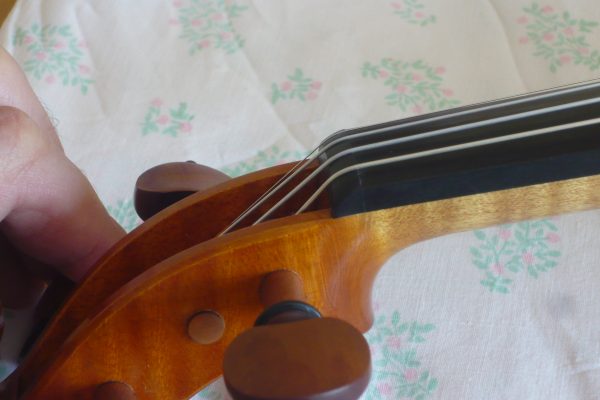
The first of three security measures concerns the shape of the nut: I make sure that it is shaped nicely so the strings run over it without a kink. This is crucial for the strings lasting. Secondly I always place a soft cloth under the tailpiece to protect the varnish on the top. Lastly, when changing strings it is recommended to change only one string at a time, then there is no issue about where the bridge should go. A misplaced bridge can affect the sound greatly. Also, if the soundpost is loose it is better if the string pressure is not released completely because it could fall.
Step 3
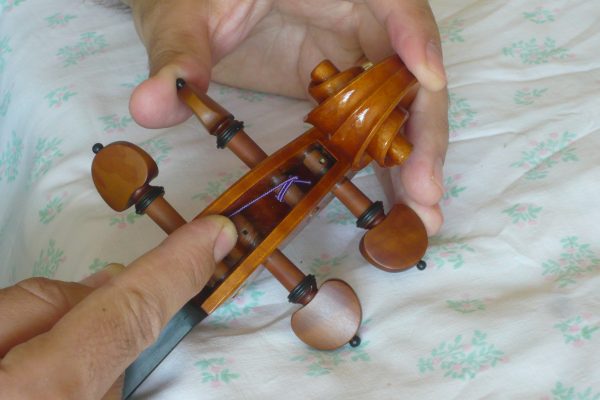
After first inserting the string end through the hole in the peg and then bending it I make a few turns on the opposite side of the string hole, then cross over the windings. This has two advantages: Firstly it ensures that there is enough space between the string and the peg box wall. Bunching the string against the pegbox wall will cause the peg to tighten and screw into the pegbox, risking damaging or cracking the pegbox wall. On a violin the A peg area is especially susceptible to this type of damage. Heads can even break off if the peg is too tight. Secondly it prevents the string from slipping when tightening it. The string should be a straight progression from the nut to the peg.
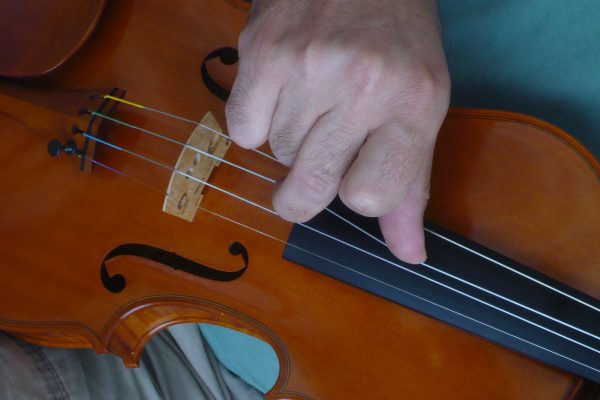
Step 4
When changing strings and tuning them, the string movement pulls the bridge forward a little every time. If the angle is not corrected the bridge will start warping quickly. Also, the sound transmission is not perfect anymore. So, the thing to do is to assess the angle and decide how much the bridge needs to be corrected. As a rule of thumb the back of the bridge should be perpendicular to the arching. I use the fingerboard and the tailpiece to rest my ring or middle fingers against and use my thumbs to readjust the bridge. One thumb pushes, the other one supports lightly. This is a safe method.
Step 5
At the beginning of my violin making career I always used Dominant strings on my new violins because it makes it easier to compare sounds from one violin to the next. Now there is a wider selection of brands. New strings can sound a bit metallic in the beginning. Having addressed this issue to the manufacturing company I received the following advice. Change one string after the other. Bring it up to pitch, take your bow and play on the string for about 30 seconds as close to the bridge as possible with great force, producing a real scratchy noise. They recommend using an inexpensive bow.

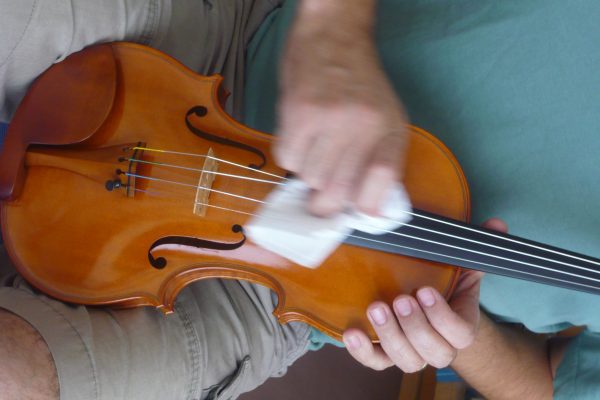
Step6
Next take a piece of cotton cloth, chamois leather, or simply a piece of kitchen towel and rub the string really well. It is important that the string is twisted as you rub it. Careful! This produces quite some heat, so I make sure I have enough material between the string and my fingers. As a result some oil from the production process is released. This is the black line on my kitchen towel. Then you tune the string down roughly a third, bring it back up to pitch and you are finished. Not only will the string be more stable in pitch right from the beginning but it will also sound warmer. This method was shown to me by the string designer of Thomastik- Infeld, so it works with their products, but please be cautious with other string brands, because their production process might be different.

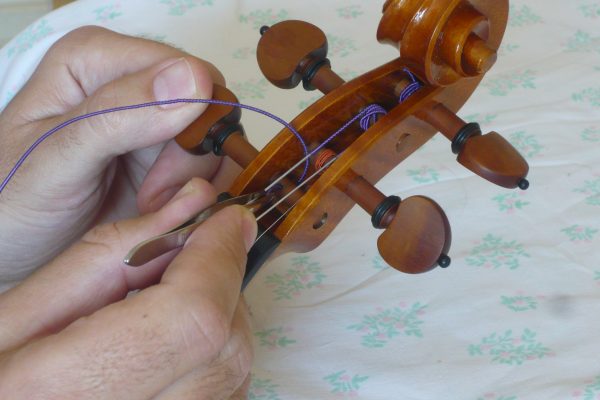
Step 7
I think pegs are a great issue for the musician. They can make your life really easy or extremely difficult. Well fitted and adjusted pegs are a fundamental prerequisite for success. However the position of the peg head is quite important too. I am not aware of any way of knowing where the peg will end up once the string is brought to pitch. If the head of the peg ends up in an awkward position it might be quite difficult to turn it in a controlled way when tuning. In order to correct this I unwind the string and pull it a bit further through the hole using a pair of tweezers if necessary. As the peg is turned clockwise to increase the pitch, pulling the end of the string through the hole further will result in the head of the peg being positioned more anti clockwise in comparison to before. Continue this procedure until you are satisfied with the peg head position for tuning.
Step 8
There is nothing more annoying for the musician if tuning is difficult. This is particularly important when players try out my violins. Therefore I always check that the peg position is comfortable. Not everyone tunes the same way but the position shown in the picture works well for me. Another concern is air humidity. Pegs being made of wood losen or tighten up with changing humidity. This can go quite quickly. It is advisable to check the pegs when coming from a very wet environment into a drier or air conditioned environment. It can become very annoying if the pegs slip suddenly. Equally, pegs can tighten up too much with an increase in air humidity to such a degree that they get stuck in which case I losen them a bit before playing or storing it. Using a small digital thermometer- hygrometer helps.
